Gamer251 Posted March 10, 2013 Posted March 10, 2013 Mind to show the link? Maybe WA could work it's magic. He doesn't have them
Kazagami Posted March 10, 2013 Author Posted March 10, 2013 Alright. WaifuLaifu Discord Server / Twitter / MUGEN releases
Kazagami Posted March 12, 2013 Author Posted March 12, 2013 Update. - Added Gozokudaisya (static image of Miko and Tojiko riding a bike. It does nothing than shooting fire to opponent) - Added Ran_Chen (Spriteswap of Yokohama Tire) WaifuLaifu Discord Server / Twitter / MUGEN releases
Kazagami Posted March 13, 2013 Author Posted March 13, 2013 Update. Added a bunch of Guilty Gear hybrids. WaifuLaifu Discord Server / Twitter / MUGEN releases
Gamer251 Posted March 14, 2013 Posted March 14, 2013 Do you have a KON Rinnosuke AI Patch by Somuee? I needed that AI Patch because Rinnosuke is easy to beat~
Kazagami Posted March 14, 2013 Author Posted March 14, 2013 Sadly no. WaifuLaifu Discord Server / Twitter / MUGEN releases
Kazagami Posted March 15, 2013 Author Posted March 15, 2013 Post it. WaifuLaifu Discord Server / Twitter / MUGEN releases
Gamer251 Posted March 15, 2013 Posted March 15, 2013 Not needed anymore. It is on KON's SkyDrive. But here it is when you have trouble finding it: http://www.mediafire.com/?cq8mwhrgq2hxvhn
Kazagami Posted March 15, 2013 Author Posted March 15, 2013 Oh alright. Thanks. WaifuLaifu Discord Server / Twitter / MUGEN releases
Gamer251 Posted March 16, 2013 Posted March 16, 2013 Oh and do you have Soku Portraits? Y'know, for the Lifebars.
Kazagami Posted March 16, 2013 Author Posted March 16, 2013 Yea, i has them. Want me to make the LB ports? WaifuLaifu Discord Server / Twitter / MUGEN releases
Gamer251 Posted March 16, 2013 Posted March 16, 2013 Sure, sure :) I have a template, how can I make a port?
Kazagami Posted March 16, 2013 Author Posted March 16, 2013 It's easy. But i don't feel like explain it. WaifuLaifu Discord Server / Twitter / MUGEN releases
Gamer251 Posted March 16, 2013 Posted March 16, 2013 Oh please :3 I need to create LBPs for my characters
Kazagami Posted March 16, 2013 Author Posted March 16, 2013 Provide the template first. WaifuLaifu Discord Server / Twitter / MUGEN releases
Kazagami Posted March 16, 2013 Author Posted March 16, 2013 I mean, give me the template. And first off...do you using GIMP? Because i didn't have Photoshop. WaifuLaifu Discord Server / Twitter / MUGEN releases
Gamer251 Posted March 16, 2013 Posted March 16, 2013 I DO have GIMP :3 Here's the template: http://www.mediafire.com/view/?qagv5yjga6asgcj
Kazagami Posted March 16, 2013 Author Posted March 16, 2013 STEP 1 First off, you need this transparent template: - Open GIMP - Create a new image, within the dimension of 146x30 - Change the foreground color, with composition of R=255, G=0, B=255. - Fill the background with the foreground color using bucket fill tool. - Prepare your character render, remember it should a .png image with transparent BG. - Open it with MS picture manager. - Edit picture > crop. Crop it until only half of the face left. - Edit picture > Resize. Set off the height to 45 px. - Save as new .png file. Then, back to GIMP. - Drag your pre-resized character image to the canvas. - Then, drag the transparent template to the canvas. MAKE SURE it fits the canvas! - Use move tool to adjust the character image as you like. Step 1 finished. Try it and let me know if you have followed it properly. Then i'll explain the next one WaifuLaifu Discord Server / Twitter / MUGEN releases
Kazagami Posted March 16, 2013 Author Posted March 16, 2013 Aww i made a little mistake. The foreground color composition is R=0, G=255, B=0. Well just change it. And do the step again. WaifuLaifu Discord Server / Twitter / MUGEN releases
Kazagami Posted March 16, 2013 Author Posted March 16, 2013 Alright, next step. - Make sure the active layer is your character image. - Then, go to "Layer" > "Transparency" > "Threshold Alpha" - Click OK, then merge down all your image. - Go to "Image" > "Mode" > select "Indexed". - Click "convert". Then go to "Color" > "Map" > "Rearrange Colormap" - Find the foreground color in the palete. Then drag it to the very first row, before the 0th palette. - Save your image as .pcx. - Voila. Your image ready to inserted via Fighter Factory. WaifuLaifu Discord Server / Twitter / MUGEN releases
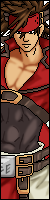
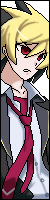
Gamer251 Posted March 17, 2013 Posted March 17, 2013 Successfully made 2 portraits! YuugenMagan and Sanae I'll post them here~
Gamer251 Posted March 17, 2013 Posted March 17, 2013 Here we go! My Lifebar Portraits! "YuugenMagan will give you the way"


.png)


Recommended Posts