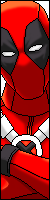
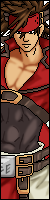
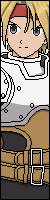
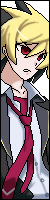
HEXSam4 Posted March 24, 2022 Posted March 24, 2022 Although there is already an excellent version in HD, I wanted to make mine as close to the original game as possible in standard 4:3 resolution. Version 3(the most recent): https://mega.nz/file/SuB3QLCY#Zq2zrvlK8r0tgv26lY5v8F2q2yhUz3lhYcDoNVo7VeI Version 2: https://mega.nz/file/3uh0WLDD#dc4ucIor5A22F376EyvVnEVZR1ecgAdyhw_tsl7DOck Version 1: https://mega.nz/file/3i5AkSZb#Ono4viSp1O7n8jKak-4usMt8WDDQwS4oJ8sxO7JMXyU More details in the description of this Video: What are the changes: -SIngle Mode -Simul Mode -Turns Mode Unlike the video, the life and power bars had shading added below them, to resemble the game it is based on. What you see in that video is almost the same, but it's from the first version I shared almost a month ago. Its differences to the new version are mere graphic adjustments for greater enjoyment. It should be noted that if you put a character without the sprite 9000,3; it will look like this: So you need to assign from Fighter Factory for it to work, there will only be the DEF file of the character you want to edit. But first open your Fighter Factory and then click on Project and then Open: then browse to the path where your character's DEF file is located and double click on it to open it. Then click on the Sprites icon, and click where it marks a sheet of paper with PCX written on it: Once you have done this, find where you have saved the image of the face of the character you want to edit; for best results convert or save your image in BMP format and in a resolution of 38x38 pixels. Then double-click to open it: Immediately you will see this window where you will enter the following values: In Group will put 9000 In Index will set 3 --In the case of the color palette-- In Group it will be set to 1 and in Index also** **(That already has to see what color i save your image with the color palette that I assign to that image; i.e. if my image has the color palette 4 of the character, in Index of the section Palette will put 4) I hope I have been clear in this part. It should be noted that the colors work differently in Mugen 1.1, since in 1.1 only one color is assigned to the icon or face of the character, in the lifebars. Once finished click OK, and done. Now to save just click on the floppy disk icon: and this will be the result: if you have any questions feel free to answer me here or in the video I shared, that would be all for the moment, have a nice weekend.


Recommended Posts